MeraForum Community.No 1 Pakistani Forum Community

| Adobe photoshop !! Adobe photo shop lectures !! |
| Advertisement |

 |
|
|
Thread Tools | Display Modes |
|
(#1)

|
|
||||
 Show Printable Version Show Printable Version
 Email this Page
08-13-2008, 04:50 PM Email this Page
08-13-2008, 04:50 PM
Learn the fine art of isolating and preserving delicate and complex shadows for transplantation to exotic new backgrounds. Mark Galer reveals how to introduce a world of exciting textures to your ever so subtle... not... studio tabletop.
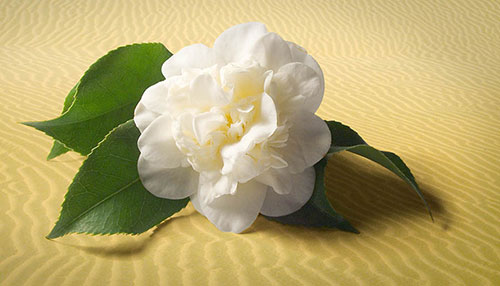 Desert Camelia 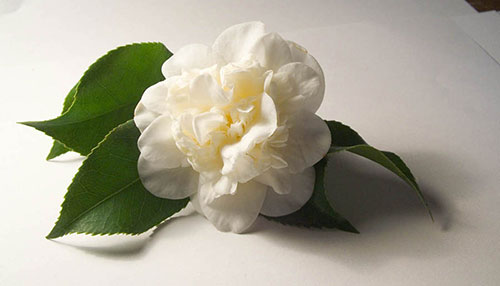 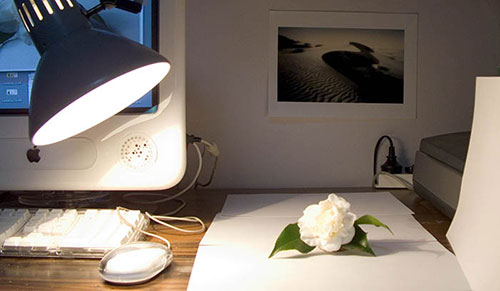 Humble beginnings – take one flower, a desk lamp and some white paper. The flower for this tutorial was photographed (using a Fuji FinePix) on a cold winters morning in Victoria whilst the sand (shot on Kodachrome film) hails from the Great Indian Desert in Rajasthan. Unlikely bedfellows, but with a little craft the two can lie together comfortably within the same frame – but only if the subtle shadow (created by a not-so-subtle 75 watt globe and a couple of pieces of white paper) is captured with all of its subtlety and delicately transplanted to its new home in the desert. This is how...! Botanical Health Warning: The delicate petals of the flower can be cooked, frazzled or fried by the heat of a tungsten lamp in just a few minutes. Be prepared to work quickly or use soft window light as a low-temperature alternative. 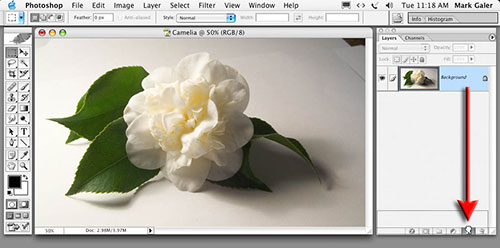 Duplicate the background layer. Step 1 Duplicate the background layer by dragging the layer to the ‘New Layer’ icon in the layers palette. Don’t worry if the edges of your white paper are in the frame. Just be sure to capture the subject and its shadow. Note: The surface used does not have to be white, but should be relatively texture-free. This will avoid mismatched textures when the shadow is transported to its new home. 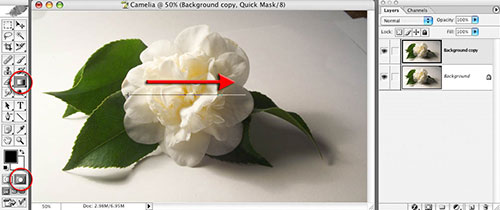 Use the gradient tool in Quick Mask mode. Step 2 The initial steps in this tutorial aim to reduce the background tone to white and leave the shadows intact. The fall-off of light from the directional light source (the white background gradually becoming grey on the side furthest from the light) can be balanced using an adjustment layer. Select the ‘Default Foreground and Background Colors’, ‘Quick Mask Mode’ and the ‘Gradient Tool’ in the ‘Tools Palette’. Select the ‘Linear Gradient’ and the ‘Foreground to Transparent’, or ‘Foreground to Background’ option in the ‘Options’ bar. Drag a gradient from the brighter side of the image to the darker side of the image. A gradient in the default masking color will appear. Exit Quick Mask mode to reveal the resulting selection. Alternative approach for Photoshop and Elements users > Adobe Elements users should proceed to the next step and create a gradient directly in the Layer Mask. 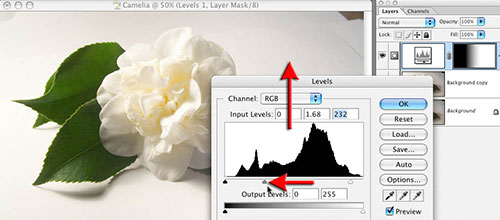 Use a levels adjustment layer to balance the background tonality. Step 3 From the base of the layers palette select a ‘Levels’ adjustment layer. The active selection will create a layer mask for the adjustment layer. Move the central ‘Gamma’ slider and/or highlight slider to the left to brighten the background so that both sides of the background are of a similar tone. Be careful not to loose the shadows in this process. Select ‘OK’ when a satisfactory balance has been achieved. 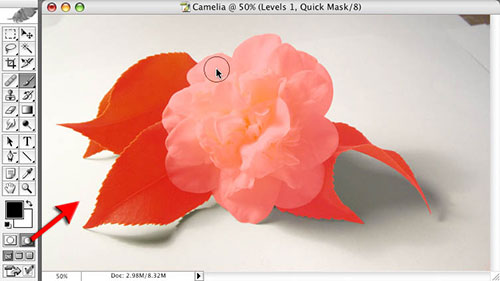 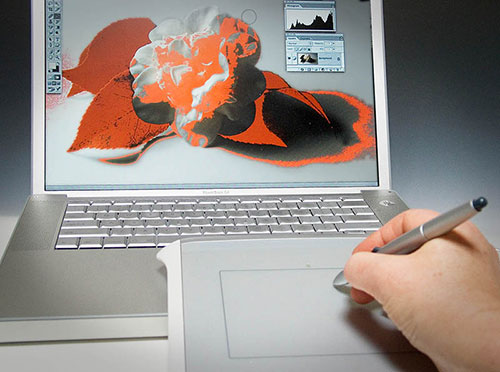 Select the subject without its shadow. A graphics tablet can help to make light work of this task. Step 4 Use the painting tools in ‘Quick Mask Mode’ to make a selection of the flower on the background layer (Elements users should use the ‘Selection Brush Tool’ and select the ‘Mask’ mode in the options bar). Remember to feather the selection appropriately or apply a small amount of ‘Gaussian Blur’ to the mask. Click on the layer mask icon in the layers palette to apply a layer mask to the background copy layer (if using Elements the selection can be used to delete the background on this layer). Note: A graphics tablet can be used to make light work of tricky selections such as the one performed in this demonstration tutorial. 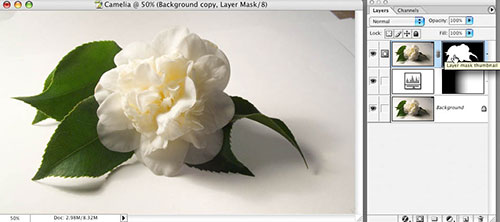 Drag the background copy layer to a position above the levels adjustment layer. Step 5 Drag the background copy layer to a position above the levels adjustment layer. This will ensure the adjustment layer created in the previous step does not affect your subject. 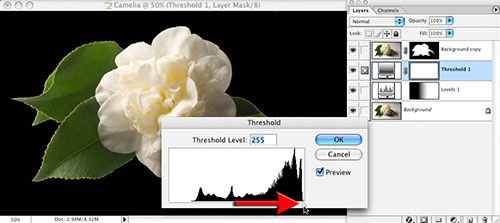 Use a ‘Threshold’ adjustment layer to render all pixels below the flower black.
|
| Sponsored Links |
|
|
|
(#2)

|
|
(#3)

|
|
(#4)

|
|
(#5)

|
|
|||
|
|
|
(#6)

|
|
|||
 Show Printable Version Show Printable Version
 Email this Page
09-08-2009, 02:47 AM Email this Page
09-08-2009, 02:47 AM
|
|
(#7)

|
|
|||
 Show Printable Version Show Printable Version
 Email this Page
06-19-2010, 01:16 PM Email this Page
06-19-2010, 01:16 PM
|
|
(#8)

|
|
|||
 Show Printable Version Show Printable Version
 Email this Page
07-19-2010, 04:40 PM Email this Page
07-19-2010, 04:40 PM
|
|
(#9)

|
|
|||
 Show Printable Version Show Printable Version
 Email this Page
07-19-2010, 04:56 PM Email this Page
07-19-2010, 04:56 PM
|
|
(#10)

|
|
|||
 Show Printable Version Show Printable Version
 Email this Page
07-21-2010, 12:43 AM Email this Page
07-21-2010, 12:43 AM
|

 |
| Bookmarks |
| Tags |
| advanced, photoshop, shadow, shadows, techniques, working |
|
|